Animations With Tracker
Objects in a three-dimensional world are designed to move. And making them move can be done not only with user input or AI implementation, it can be done with animation. Surely, if you've played games, you've noticed small clips between game episodes, in which movement in the frame is performed according to a certain scenario, like in a movie, or stunning camera fly-throughs displaying shining cars before a race start. To add such dynamic gameplay elements or create in-game cinematic cut-scenes, UNIGINE has the Tracker tool that allows creating animations based on keyframes. It gives developers the ability to:
- Easily create key frames for all nodes in the world, as well as animate movements, camera parameters, and all available render settings.
- Set up day-night shift and weather conditions change.
- Switch between the cameras, the field of view on the fly and play sounds for creating professional cinematics.
- Animate interactive objects in the game, for example, lighting a torch, opening a door, or moving a platform.
- Apply post-processing effects such as DOF, Motion blur, SSR, etc. All these effects can be fine-tuned for each camera view.
- And much more.
Moreover, the Tracker interface supports saving and loading of the created tracks, custom loop ranges, key cloning and snapping, as well as playback speed control. The tool window includes the following elements: track settings, track list, timeline panel and graphical representation of parameter changes.
![]()
Key Frame Animation#
Tracker animations consist of a number of tracks and each track indicates how a parameter changes over the specified time. The track can control some render effect or can be bound to a specific node in the world. If you need to animate multiple parameters of one node at the same time, simply create multiple tracks for it. For example, you can use tracks to create animations that:
- Move nodes, toggle skinned animation, control emission of particles, etc.
- Change any material settings and modify parameters for various configurable effects. For example, you can change the texture and material reflectivity to create the rain effect.
- Change rendering settings: change the background color, apply post-process effects, control stereo and much more.
- Set up cameras.
Key Frames#
A track is composed of key frames, which are snapshots of the parameter value at a certain time during the animation. Each key frame stores a time and the parameter change (new parameter value or enabled/disabled state). For example, for a node position track, a key frame specifies a new node position along one of the axes; for a node enable track, a key frame indicates whether node rendering is enabled or disabled.
This key frame parameter value is set for the interval between the current key frame and the next key frame. Depending on the transition mode, the key frame values can be switched abruptly or smoothly interpolated:
- Linear interpolation can be used, for example, for a node scaling track.
- Bezier interpolation will provide a smooth curve for a node position track.
In the Tracker panel you can switch transition modes and set keyframe parameters (time and value).
![]()
|
|
Constant mode (no transition). Key frame value remains constant up to the next key frame, where it abruptly changes.
|
|---|---|
|
|
Linear interpolation. Key frame value is linearly interpolated between neighboring key frames.
|
|
|
Smooth interpolation by Bezier spline. There are two control points available for each keyframe.
|
|
|
Interpolation by Bezier triangle. The sharp transition between key frame values can be created. There are two control points available for each keyframe.
|
|
|
Automatic interpolation by Bezier spline. No control points are available as the curve is smoothed automatically.
|
|
|
Remove selected key frames. |
|
|
Snapping mode for key frames. When a key frame is dragged along the track line, this mode pulls a keyframe into alignment with other key frames (on the same or other tracks). It can also be enabled by holding ALT. |
Practice#
Now let's try to create a track for animating the camera movement (so called fly-through) in our interior scene, for this purpose let's open the scene in the editor.
To open the Tracker tool, choose Tools → Tracker from the main menu.
To create a track with key frames to animate a parameter (rendering setting, node or material parameter, etc.):
- Add a track that will animate the movement of our camera: Click
 . This will open the Add Parameter window.
 -
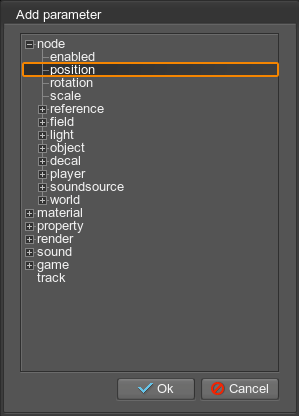
Select a parameter from the list, in our case it will be node → position.
-
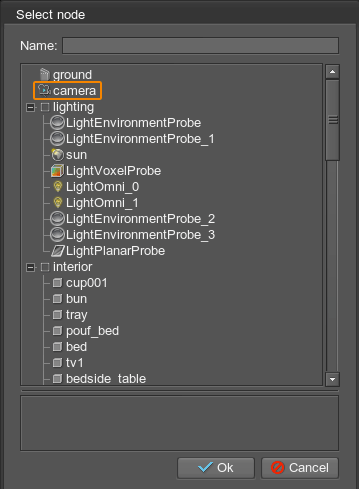
Since the track animates the movement of the camera (Player) node, you must bind it to a specific node in the Select Node window that opens. Select the camera node and click Ok.
- The track is added, now let's do the same for the node → rotation parameter (we will change the camera rotation as well).
-
Now let's set the duration of our clip, click
 on the panel at the bottom to open the settings.
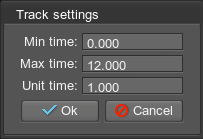
- In this window we will specify the beginning (0) and the end (12) of our clip – it will last 12 seconds. By the way, the third parameter (Unit Time) is used as a scaling multiplier, using it alone you can make the clip play faster or slower.
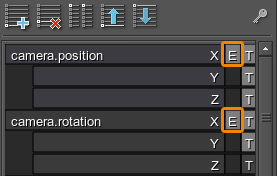
Now everything is ready to start working with key frames directly. You can set time and parameter values manually in the Time and Value fields in the panel — by double-clicking to add a key frame and using the buttons on the timeline, but we'll make it easier. By default in the Editor, the display is automatically bound to the Tracker (i.e. if you move the current time slider on the timeline, the corresponding node or parameter will change according to the track). In this case, the node the position of which is controlled by the track can't be moved anywhere (it will always return to the track point). So first of all, let's disable binding to the track by clicking the E icons next to the camera.rotation and camera.position tracks.
Then do the following:
-
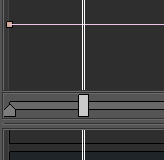
Switch to the camera view in the viewport and, controlling the camera, set it to the first position and rotate it as you want. Then move the timeline slider to the point in time when you want the camera to occupy the set position (say 0.5 seconds from the start).
- Now that the position and rotation for the first frame are set, select the camera.position track by clicking on its title and click the
 button. Tracker will automatically create a key frame for the moment specified on the timeline and record the current camera position in it. Now select the track for camera rotation (camera.rotation) and click the
  button again to also record the current rotation for the same point in time. The first keypoint is ready! You just need to make a smooth transition.
 - To make a smooth transition, select all points of the key frame and click the
 button on the top panel of Tracker.
 - Repeat the same for other points by moving and rotating the camera, sliding the current moment slider on the timeline and pressing the
 button for each track.
 -
When all points are placed, you can play the track using the buttons on the panel below (once or repeatedly).

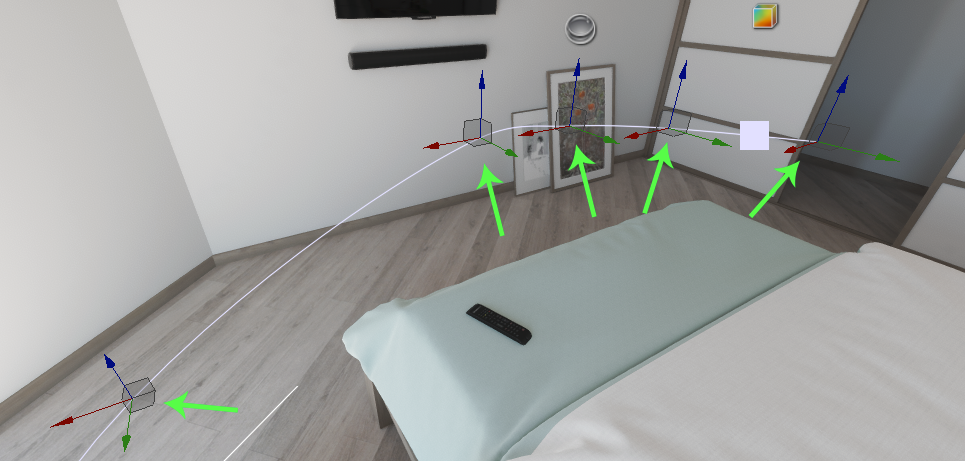
During playback, you can switch to the Editor Camera view in the viewport and see how the camera node moves along the trajectory. Here you can also move the manipulators placed at key points to change the trajectory in real time.
The last thing left to do is to save our track, so that it can be used further (for example, to play the fly-through from code, as in cutscenes).
To save the track to a *.track file, click Save and in the dialog box that opens, specify the name of the track file — let's call it camera_animation.track and save it to the data/tracks folder.
If there are several tracks in the current list (as we have for rotation and movement), they will all be saved to a single *.track file.
To load a previously saved track, click Load and select the track file in the dialog box that opens.
You can also use Tracker to mix several animations stored in different files into one and make complex video scenes.
The information on this page is valid for UNIGINE 2.19.1 SDK.