Scene Navigation
In UnigineEditor 2, there are controls that are used to move in the scene and control the camera behavior. All the available controls can be found in the Controls section of the Settings window.
The camera can be moved freely in the scene or relative to a target. In terms of UnigineEditor 2, the target is a point relative to which the camera is positioned. You can set the target by focusing the camera on a selected node or a group of nodes.
Whether the target is set or not, you can freely navigate in the scene: move the camera, change direction of the camera (horizontally and vertically), track the camera or zoom it in and out.
If the camera is focused on a node (in other words - positioned relative to the target), you can also orbit the camera about the target and zoom it towards or away from the target by using the dolly zoom.
In addition to the commonly used terms (for example, Move left, Move up and so on), the following terms are used in UnigineEditor 2:
- Change direction means changing the yaw / pitch angle to rotate the camera around its vertical / horizontal axis respectively.
- Track (Crab) means tracking the camera in the plane which is perpendicular to the view direction.
- Orbit means tumbling around the target.
- Zoom (Dolly) means zooming the camera towards or away from the target so that the camera cannot continue to zoom in when it reaches the target.
The following schemes demonstrate the main navigation controls that are used in the UnigineEditor:

|

|
|
Navigation controls used to freely move the camera in the scene
|
Additional navigation controls used to move the camera relative to the target
|
Focusing the Camera
To set and reset the camera focus, you can use the following default controls:
| Control | Description |
|---|---|
| F | Focus the camera on the selected nodes. |
| G | Reset the camera focus. |
When you focus the camera on the group of nodes, you should set the pivot point (see Pivot Point Toggle for details) on the main menu:
- If the pivot point is set to Center (
 is set), the target will be set to the center of selection.
 The Center button is active
 - If the pivot point is set to Pivot (
 is set), the target will be set to the last selected node.
 The Pivot button is active; Node 2 is the last selected node
If you focus the camera on the node (or the group of nodes), the target position will coincide with the center of the node (or the group of nodes). Therefore, you will be able to orbit the camera around this target and zoom (dolly) the camera towards or away from this target.
Moving the Camera
To move in the scene, you can use the following default controls:
Also you can change the camera position by setting its coordinates via the Navigation Panel of the Scene Viewport as follows:
Zooming the Camera
To zoom the camera, you can use the following default controls:
| Control | Description |
|---|---|
| WHEEL UP | Zoom the camera in.
Notice
If the camera reaches the target and continues zooming, the target will be moved with the camera. |
| WHEEL DOWN | Zoom the camera out.
Notice
When zooming out, the position of the target remains the same. |
| Alt + RIGHT CLICK + Drag | Zoom (dolly) the camera toward or away from the target by using the dolly zoom. |
Changing the Camera Speed
There are 3 modes of the camera speed. You can switch between them via the Navigation Panel. Also you can change the speed value set for one of the speed modes. For example, you can change the value of the 1st speed node as follows:

In addition, the following controls can be used to change the camera speed:
| Control | Description |
|---|---|
| Shift | Speed up the camera movement. Press and hold this key when moving the camera. |
| 1 / 2 / 3 | Enable the 1st, the 2nd or the 3rd mode of the camera speed. |
Camera Utilities

| Control | Description |
|---|---|
| L | Toggle a flashlight attached to the camera. |
Flashlight Settings
Using Several Cameras
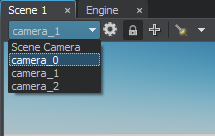
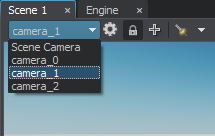
In a large virtual world, you can use cameras as watchpoints for fast navigation: you can add and position any number of the cameras in different points of the world, save their positions and then switch between them via the Camera panel of the Scene Viewport when it is necessary.
To create such watchpoint:
- Add a new camera to the world.
- Position the camera.

|

|
|
camera_0 camera used as watch-point
|
camera_0 camera view
|

|

|
|
camera_1 camera used as watch-point
|
camera_1 camera view
|
When you switch to one of the saved cameras, you can freely move it in the world: changes in its position and orientation won't be saved.
 is set on the
Camera panel) before moving it. Otherwise, all changes in its position and orientation will be recorded and you will have to position and save the camera again.