Практика
To build our ArchViz project, do the following:Для сборки нашего ArchViz-проекта сделайте следующее:
-
Open the project in UnigineEditor. Then choose File → Create Build. The Create Build window will open.Откройте проект в Редакторе UnigineEditor. Затем выберите File → Create Build. Откроется окно Create Build.

- In the Create Build window select the Release value for the Build Type setting.В появившемся окне Create Build выберите для Build Type значение Release.
- Specify the project name (ArchViz-Interior) and set the output folder in the Build Folder box (this folder must be outside your project folder and must be empty). Make sure that our world (archviz.world) is set as the Default World.Укажите имя ArchViz-Interior и укажите выходную папку в поле Build Folder (эта папка должна находиться вне папки вашего проекта и должна быть пустой). Убедитесь, что в качестве мира, открываемого по умолчанию (Default World) установлен наш мир (archviz.world).
- Drag and drop the app_icon.png asset to the Application Icon box — this will be our application's icon.В поле Application Icon перетащите ассет app_icon.png – это будет иконка для нашего приложения.
-
The Delete Unused Assets option by default deletes files that are not referenced by other assets — for example, in our project the fan sound archviz/sounds/fan_sound.mp3 is used only in our code (the Build tool doesn't know this). This is the case when you need to force-include it manually. Click Add Line (1) to add a new line to the list, write the path to the file: archviz/sounds/fan_sound.mp3, and, since the *.mp3 asset has no runtime, check Source (2), then click Check (3) to check if the desired asset is included in the Check List.Опция Delete Unused Assets по умолчанию удаляет файлы, на которые не ссылаются другие ассеты – например, в нашем проекте звук вентилятора archviz/sounds/fan_sound.mp3 используется только в нашем коде (инструмент Build этого не знает). Это тот случай, когда нужно принудительно включить его вручную. Просто добавьте строку в список, щелкнув Add Line (1), напишите путь к файлу archviz/sounds/fan_sound.mp3 и, поскольку *.mp3-ассет не имеет рантайма, установите галочку Source (2), затем нажмите Check (3), чтобы проверить, попал ли нужный ассет в список (Check List).

- You can also include files that are stored outside your project (such as a license text or end-user agreement).Также можно дополнительно включить в сборку файлы, которые хранятся вне вашего проекта (например тексты лицензий или соглашение с конечным пользователем).
-
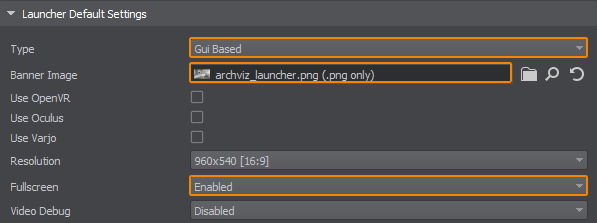
Let's add a launcher module for our application by selecting the GUI-Based type in the Launcher Default Settings group. Drag the archviz_launcher.png asset into the Banner Image box — it will be displayed in the launcher. And enable Full Screen mode.Добавим для нашего приложения модуль запуска, для этого выберите в группе Launcher Default Settings тип GUI-Based. Перетащите ассет archviz_launcher.png в поле Banner Image – это будет титульное изображение. И включите режим Full Screen.

-
To start the build process, click the green Create Build button at the bottom of the Create Build window. A progress bar will show the current status of the build process.Для запуска процесса сборки нажмите зеленую кнопку Create Build в нижней части окна Create Build. Появится индикатор выполнения, показывающий текущий статус процесса сборки.

-
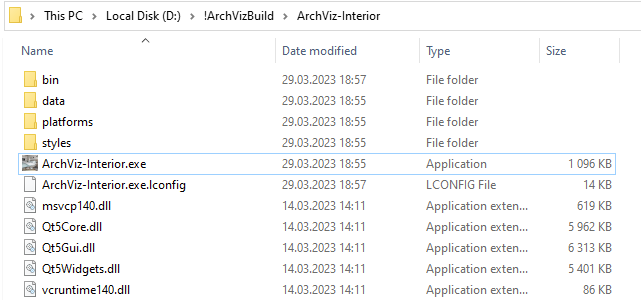
When the build process is complete, the target folder where the project was built will automatically open. All required files are available, everything unnecessary has been removed.По окончании процесса сборки автоматически откроется целевая папка, в которую был собран проект. Все нужные файлы на своих местах, все лишнее убрано.

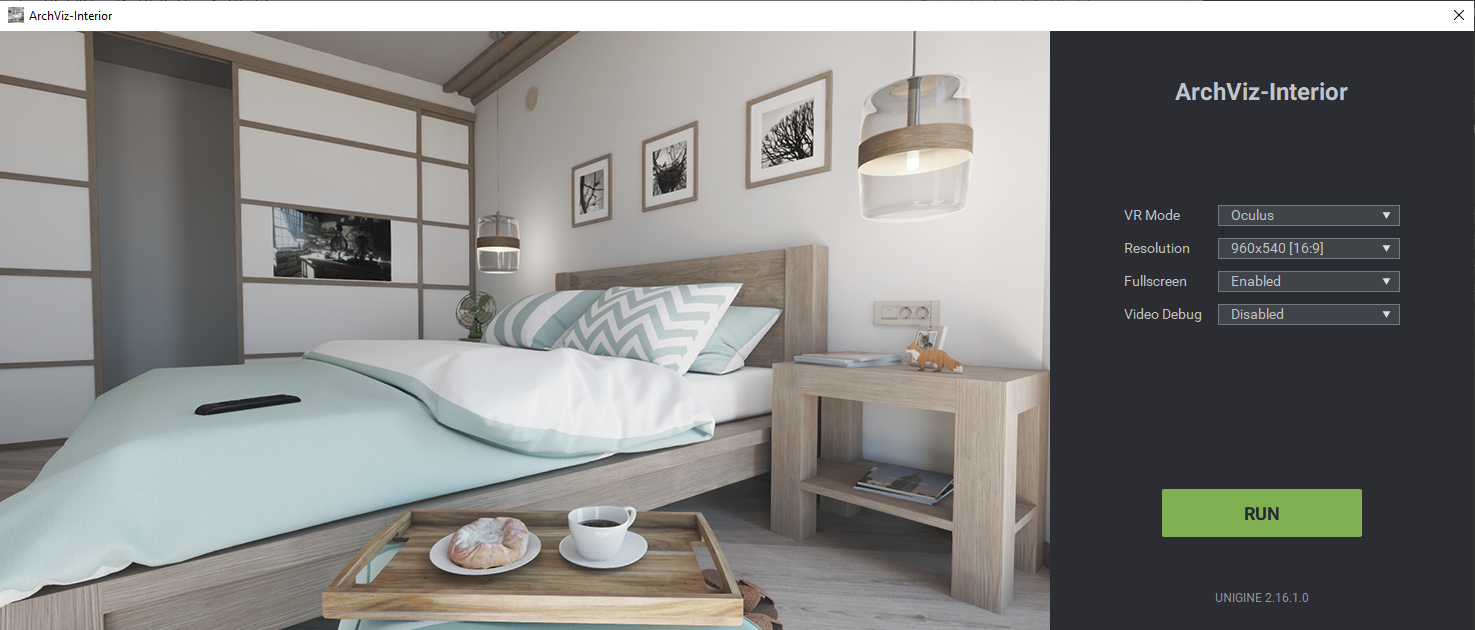
After launching the ArchViz-Interior.exe file, you will see the launcher window, which allows you to run our application with the required settings:После запуска файла ArchViz-Interior.exe вы увидите окно модуля запуска, которое позволяет запустить наше приложение, выбрав нужные настройки:

Now it's time to celebrate, because your first project with an interactive interior scene is ready! And there's a lot more to come.А теперь время принимать поздравления, поскольку ваш первый проект с интерактивной интерьерной сценой полностью готов! А у нас впереди еще много интересного.
