Exporting Nodes with Node Export Plugin
Node Export is a UnigineEditor plugin designed for exporting assets from one project into another. The assets include:
- Nodes
- Meshes
- Textures
- Materials
- Properties
- Terrains
The plugin provides the following functionality:
- Automatic correction of paths in the exported *.node, *.mat and *.prop files that refer to the source project.
- Adding the exported materials and properties to the required materials' libraries without deleting the materials and properties that already exist.
- Copying all dependencies of each node in the selection (e.g. all of the nodes of the selected WorldCluster will be exported with the meshes, materials, textures and so on).
Loading Plugin
To load the Node Export plugin via UnigineEditor:
- Run UnigineEditor.
- On the Menu bar, click Plugins -> Manage.
- In the Plugins window that opens, set the Node Export plugin enabled.
 List of available plugins for UnigineEditor
 - Close the Plugins window.
The Node Export plugin will open:

Exporting Assets
Using the Source Project Structure
This mode should be used when the target project have the same folder structure as the source one. This mode is appropriate when exporting the large number of assets with lots of dependencies.
- In the Nodes panel of the UnigineEditor, select all of the nodes that need to be exported
- In the Data folder edit line, specify the full path to the data folder of the target project, into which the assets should be exported.
- In the Local folder edit line, specify the relative path to the target project folder.

- *(Optional) Check the Remove part of the path option and specify the part of the path to a source project folder with assets that should be removed.
The part of the path should be relative to thedata folder of the source project.

- Click Export and wait until the export is finished.

- In the Save Node dialog window that opens, choose the folder and specify a name of the *.node file into which the selected nodes will be saved and then click Ok.
Using the Target Project Structure
This mode should be used when the target project has the folder structure that differs from the structure of the source project. This mode is appropriate for exporting the assets without dependencies (for example, static meshes, grass, clusters, clutters, terrains).
- In the Nodes panel of the UnigineEditor, select all of the nodes that need to be exported.
- Specify the paths to the target project as described above.
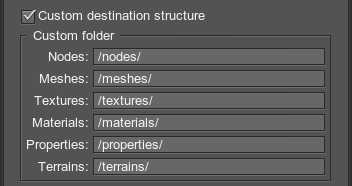
- Check the Custom destination structure option and specify all of the relative paths for the required types of the assets.

- *(Optional) Check the Remove part of the path option and specify the part of the path to a source project folder with assets that should be removed.
The part of the path should be relative to thedata folder of the source project.

- Click Export and wait until the export is finished.

- In the Save Node dialog window that opens, choose the folder and specify a name of the *.node file into which the selected nodes will be saved and then click Ok.
Plugin Options
The list of available plugin options depends on the export mode:

|

|
|
Options available when using the source project structure while exporting
|
Options available when using the target project structure while exporting
|
Usage Example
To demonstrate usage of the Node Export plugin, lets export the assets of the D:/src_project/ project to the D:/dest_project/ project that has a custom folder structure.
The assets of the source project are stored under the data directory in the src_project folder as follows:
-
 data
data
-
 src_project
-
 materials
 -
 meshes
-
 buildings
 -
 vegetation
 -
 vehicles
-
-
 nodes
nodes
-
 buildings
 -
 vegetation
 -
 vehicles
-
-
 textures
-
 buildings
 -
 vegetation
 -
 vehicles
-
-
-
To export the assets, perform the following:
- Load the Node Export plugin
- Select the nodes that should be exported in the Nodes panel.
- Specify the full path to the data folder of the target project in the Data folder edit line.
- Specify the relative path to the target project folder in the Local folder edit line:

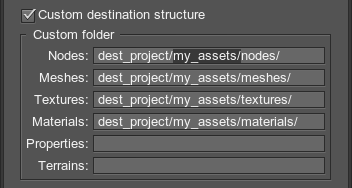
- Check the Custom destination structure option and specify the relative paths for each type of the assets:

- Check the Remove part of the path option and specify the part of the path to a source project folder, from which the assets will be exported, that should be removed:

- Click Export and wait until the export is finished.

- In the Save Node dialog window that opens, choose the folder and specify a name of the *.node file into which the selected nodes will be saved and then click Ok.
After exporting the assets, they will be stored in the target project D:/dest_project/ as follows:
-
 data
data
-
 dest_project
-
 my_assets
-
 materials
 -
 meshes
 -
 nodes
nodes -
 textures
-
-
-
-
 my_assets
-
 scr_project
-
 materials
 -
 meshes
 -
 nodes
nodes -
 textures
-
-