立体渲染
Unigine supports "easy on the eye" stereo 3D rendering out-of-the box for all supported video cards. Unigine-powered 3D stereoscopic visualization provides the truly immersive experience even at the large field of view or across three monitors. It is a completely native solution for both DirectX and OpenGL APIs and does not require installing any special drivers. Depending on the set stereo mode, the only hardware requirements are the equipment necessary for stereoscopic viewing (for example, active shutter glasses, passive polarized or anaglyph ones) or a dedicated output device.Unigine为所有受支持的视频卡开箱即用地支持“随心所欲”的立体3D渲染。由Unigine驱动的3D立体可视化即使在大视野内或在三台显示器上也能提供真正的沉浸式体验。它是DirectX和Vulkan API的完全本机解决方案,不需要安装任何特殊的驱动程序。根据设置的立体声模式,唯一的硬件要求是立体观看所需的设备(例如,主动式快门眼镜,被动式偏光或立体眼镜)或专用的输出设备。
Stereo Modes立体声模式#
There are several modes of stereo rendering available for Unigine-powered application. To enable them, no special steps or modifications are required. Just use a ready-compiled plugin library, set the desired start-up option and you application is stereo-ready!Unigine支持的应用程序有几种立体声渲染模式。要启用它们,不需要任何特殊步骤或修改。只需使用一个现成的插件库,设置所需的启动选项,您的应用程序即可使用立体声!
Stereo libraries are located in the lib/ folder of the UNIGINE SDK.立体声库位于UNIGINE SDK的lib/文件夹中。
Separate Images分开的图像#
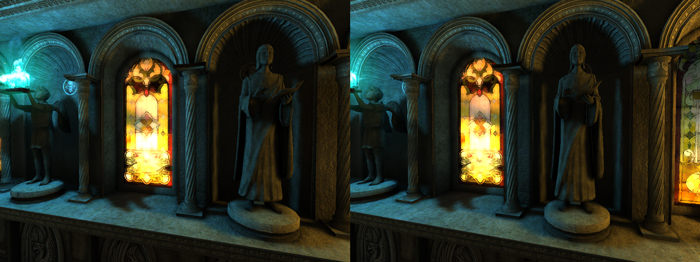
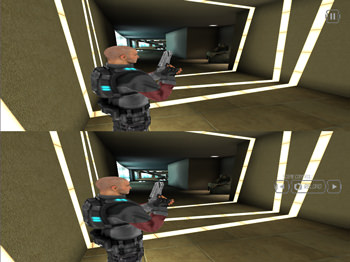
This mode serves to output two separate images for each of the eye. It can be used with any VR/AR output devices that support separate images output, e.g. for 3D video glasses or helmets (HMD). See further details on rendering below.此模式用于为每只眼睛输出两个单独的图像。它可以与任何支持单独图像输出的VR / AR输出设备一起使用,例如用于3D视频眼镜或头盔(HMD)。请参见下面有关渲染的更多详细信息。
To launch Separate images stereo mode, load the Separate plugin.要启动单独的图像立体声模式,请加载Separate插件。
Quad Buffered StereoQuad Buffered Stereo#
This mode uses the best of the native hardware support of 3D stereo in NVIDIA Quadro video cards which are capable of quad buffering. Unigine utilizes it to gain a good performance. However, other NVIDIA cards also support this mode and show no lower level of performance.此模式使用能够进行四倍缓冲的NVIDIA Quadro视频卡中对3D立体声的最佳本机硬件支持。 Unigine利用它来获得良好的性能。但是,其他NVIDIA卡也支持此模式,并且性能不会降低。
To enable the Quad Buffered Stereo mode, follow the instructions.要启用Quad Buffered Stereo模式,请遵循说明。
Oculus RiftOculus Rift#
This mode is used to support the Oculus Rift head-mounted display (the HD mode is also available).此模式用于支持Oculus Rift头戴式显示器(也提供HD模式)。
To launch Oculus Rift mode, load the Oculus plugin.要启动Oculus Rift模式,请加载 Oculus插件。
Anaglyph ModeAnaglyph Mode#
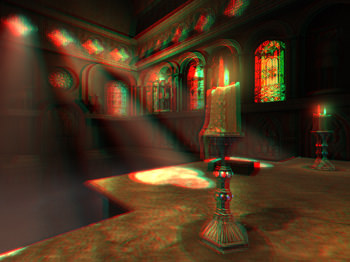
Anaglyph stereo is viewed with red-cyan anaglyph glasses. See further details on rendering below.立体浮雕立体可以通过红-青立体浮雕眼镜观看。请参见下面有关渲染的更多详细信息。
To launch Anaglyph stereo mode:要启动Anaglyph立体声模式:
- Specify the STEREO_ANAGLYPH definition on the start-up (together with other required CLI arguments).在启动时指定 STEREO_ANAGLYPH 定义(以及其他必需的 CLI 参数)。
- Run the 64-bit application (or its debugging version).运行64位应用程序(或其调试版本)。
main_x64 -extern_define STEREO_ANAGLYPH
Interlaced LinesInterlaced Lines#
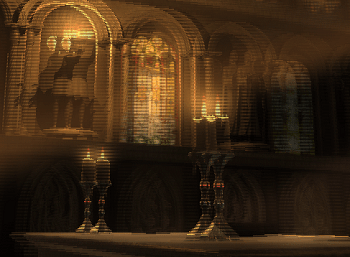
Interlaced stereo mode is used with interlaced stereo monitors and polarized 3D glasses. See further details on rendering below.隔行立体声模式与隔行立体声监视器和偏光3D眼镜一起使用。请参见下面有关渲染的更多详细信息。
To launch the interlaced lines stereo mode:要启动隔行扫描立体声模式:
- Specify the STEREO_INTERLACED definition on the start-up (together with other required CLI arguments).在启动时指定 STEREO_INTERLACED 定义(以及其他必需的 CLI 参数)。
- Run the 64-bit application (or its debugging version).运行64位应用程序(或其调试版本)。
main_x64 -extern_define STEREO_INTERLACED
Split StereoSplit Stereo#
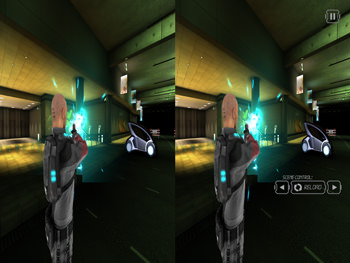
Horizontal and Vertical stereo modes are supported for glass-free MasterImage 3D displays. The same mode (a horizontal or a vertical one) is selected in the graphics chip driver settings. See further details on rendering below.无玻璃的MasterImage 3D显示器支持水平和垂直立体声模式。 在图形芯片驱动程序设置中选择了相同的模式(水平或垂直模式)。 请参见下面有关渲染的更多详细信息。
To launch Horizontal stereo mode:要启动水平立体声模式:
- Specify the STEREO_HORIZONTAL definition on the start-up (together with other required CLI arguments).在启动时指定 STEREO_HORIZONTAL 定义(以及其他必需的 CLI 参数)。
- Run the 64-bit application (or its debugging version).运行64位应用程序(或其调试版本)。
main_x64 -extern_define STEREO_HORIZONTAL
To launch Vertical stereo mode:要启动垂直立体声模式:
- Specify the STEREO_VERTICAL definition on the start-up (together with other required CLI arguments).在启动时指定 STEREO_VERTICAL 定义(以及其他必需的 CLI 参数)。
- Run the 64-bit application (or its debugging version).运行64位应用程序(或其调试版本)。
main_x64 -extern_define STEREO_VERTICAL
Stereo Rendering Model立体渲染模型#
The stereo rendering model uses asymmetric frustum parallel axis projection (called off-axis) to create optimal stereo pairs without vertical parallax (vertical shift towards the corners).
It means, two cameras with parallel lines of sight are created, one for each eye. They are separated horizontally relative to the central position (this distance is called the eye separation distance and can be adjusted to avoid eyestrain from stereoscopic viewing). Both cameras use asymmetric frustum, when the far plane is parallel to the near plane, yet they are not symmetrical about the view axis. It enables to correctly align projection planes of two cameras to the zero parallax plane (i.e. the screen). Asymmetric frustum parallel axis projection produces no distortions in the corners making the stereoscopic image completely comfortable to the eye.
立体渲染模型使用不对称的平截头体平行轴投影(称为离轴)来创建最佳的立体对,而没有垂直视差(垂直向角落移动)。
,将创建两个具有平行视线的相机,每只眼睛一个。它们相对于中心位置在水平方向上分开(此距离称为眼睛分开距离,可以进行调整以避免立体视觉引起的眼睛疲劳)。当远平面与近平面平行时,两个摄像机都使用不对称的视锥,但它们相对于视轴不对称。它可以将两个摄像机的投影平面正确地对准零视差平面(即屏幕)。不对称的平截头体平行轴投影不会在拐角处产生任何扭曲,从而使立体图像完全舒适。
When rendered, objects that get in front of the camera's focal distance (that is, its projection plane) are perceived as popping out of the screen; objects that are behind it appear to be behind the screen and convey the impression of scene depth.渲染时,位于相机焦距(即其投影平面)前面的对象会被视为从屏幕弹出。屏幕后面的对象似乎在屏幕后面,传达了景深的印象。
Unigine Stereo Rendering PipelineUnigine立体渲染管线#
Unigine engine calculates the images for both eyes using the appropriate postprocess shader. Which shader is applied depends on the chosen stereo mode.Unigine引擎使用适当的后期处理着色器为两只眼睛计算图像。应用哪种着色器取决于所选的立体声模式。
- Anaglyph mode uses the post_stereo_anaglyph postprocess material and only one render target. Two images are filtered by red and blue channels, superimposed and output onto the screen to be viewed through colored glasses. Anaglyph 模式使用 post_stereo_anaglyph 后处理材质和仅一个渲染目标。 两个图像由红色和蓝色通道过滤,叠加并输出到屏幕上,以通过有色眼镜观看。
- Separate images mode uses the post_stereo_separate postprocess material. It creates two render targets and outputs left and right eye images that are offset relative to each other onto the two separate monitors. 分离图像 模式使用 post_stereo_separate 后处理材质。 它创建两个渲染目标,并将相对于彼此偏移的左眼图像和右眼图像输出到两个单独的监视器上。
- Oculus Rift mode uses the post_stereo_separate postprocess material. Images for the left and right eyes are output onto the corresponding half of the screen and lenses of the Oculus Rift display distort them to make the eyes perceive this images the same way as in the real world. Oculus Rift 模式使用 post_stereo_separate 后处理材质。 左眼和右眼的图像被输出到屏幕的相应一半,Oculus Rift显示屏的镜头使它们失真,以使眼睛察觉到该图像的方式与在现实世界。
- In case of Quad Buffer mode, the post_stereo_separate postprocess material is used.在Quad Buffer模式的情况下,使用 post_stereo_separate 后处理材质。
- Interlaced lines mode uses the post_stereo_interlaced postprocess material. This mode is based on the interlaced coding. For example, the image for the left eye can be displayed on the odd rows of pixels with one polarization and the image for the right eye - on the even rows with other polarization. 隔行扫描线 模式使用 post_stereo_interlaced 后处理材质。 此模式基于隔行编码。例如,左眼的图像可以显示在具有一种偏振的奇数行像素上,而右眼的图像可以显示在具有另一种偏振的偶数行上。
- Horizontal and Vertical stereo modes use only one render target. After that, the graphics chip driver handles it as two images aligned horizontally or vertically (depending on the set mode) and stretches them onto the screen to create a stereo effect. If the horizontal stereo mode is used, the post_stereo_horizontal postprocess material is applied. In case of the vertical stereo mode, the post_stereo_vertical postprocess material is used. 水平和垂直 立体模式仅使用一个渲染目标。之后,图形芯片驱动程序将其作为水平或垂直对齐的两个图像(取决于设置模式)进行处理,并将其拉伸到屏幕上以创建立体声效果。 如果使用水平立体模式,则会应用 post_stereo_horizontal 后处理材质。 在 vertical 立体声模式下,将使用 post_stereo_vertical 后处理材质。
If stereo rendering is disabled (for example, when 3D Vision application is switched to the windowed mode), post_stereo_replicate material is used and the postprocess shader creates a simple mono image (the same for all viewports, if there are many). This material allows to switch to normal rendering and avoid the black screen when the engine is not rendering stereo pairs.如果禁用了立体渲染(例如,当3D Vision应用程序切换到窗口模式时),则使用 post_stereo_replicate 材质,并且后处理着色器将创建一个简单的单色图像(如果存在,则所有视口都相同)很多)。当引擎未渲染立体声对时,此材质允许切换到正常渲染并避免黑屏。
Stereo rendering is optimized to be performance friendly while not compromising the visual quality. For example, shadow maps are only rendered once and used for both eyes; geometry culling is also performed only once. Most of the rendering passes are still doubled, that is why it might make sense to turn off unnecessary passes or set a global shader quality to lower level to minimize the performance drop.立体渲染经过优化,性能友好,同时又不影响视觉质量。例如,阴影贴图仅渲染一次并用于双眼;几何图形剔除也仅执行一次。大多数渲染通道仍是翻倍的,这就是为什么关闭不必要的通道或将全局着色器质量设置为较低级别以最大程度地降低性能下降的原因。
Customizing Stereo定制立体声#
Stereo rendering can be controlled via the following code:立体声渲染可以通过以下代码控制:
- Stereo script stereo.h (located in data/core/scripts/system folder). By default it is included in the system script unigine.cpp. You can modify the stereo.h script in order to change the default camera configuration.立体声脚本stereo.h(位于data/core/scripts/system文件夹中)。默认情况下,它包含在系统脚本unigine.cpp中。 您可以修改stereo.h脚本以更改默认相机配置。
- If you choose not to include the stereo script into the system one, you can set the appropriate stereo mode definition and control stereo parameters directly via engine.render.setStereoRadius() and engine.render.setStereoDistance() functions.
In this case, you need to implement your own camera configuration in the render() function of the system script:
源代码 (UnigineScript)如果选择不将立体声脚本包含在系统脚本中,则可以通过 engine.render.setStereoRadius() 和 engine.render.setStereoDistance() 函数。 在这种情况下,您需要在系统脚本的render()函数中实现自己的摄像机配置:
int render() { #ifdef STEREO_MODE // implementation of a custom camera configuration #endif return 1; }源代码 (UnigineScript)int render() { #ifdef STEREO_MODE // implementation of a custom camera configuration #endif return 1; }
Hidden Area隐藏区域#
Some pixels are not visible in VR. You can optimize rendering performance by skipping them. The following culling modes are available for such pixels:有些像素在VR中不可见。您可以跳过它们来优化渲染性能。以下剔除模式可用于此类像素:
- OpenVR-based culling mode - culling is performed using meshes returned by OpenVR. Take note, that culling result depends on HMD used.基于OpenVR的剔除模式-使用OpenVR返回的网格进行剔除。请注意,剔除结果取决于所使用的HMD。
- Custom culling mode - culling is performed using an oval or circular mesh determined by custom adjustable parameters.自定义剔除模式-使用由自定义可调参数确定的椭圆形或圆形网格执行剔除。
You can specify a custom mesh representing such hidden area, adjust its transformation and assign it to a viewport.您可以指定表示该隐藏区域的自定义网格,调整其变换并将其分配给视口。
To set the value via the console, use the render_stereo_hidden_area console command.要通过控制台设置值,请使用render_stereo_hidden_area控制台命令。
本節中的文章
本页面上的信息适用于 UNIGINE 2.19 SDK.
