建立项目
Let's create a new project for our game and set up a level world with a camera view.让我们为我们的游戏创建一个新的项目,并设置一个带有相机视图的关卡世界。
Step 1. Download Assets and Create the Project步骤1。下载资源和创建项目#
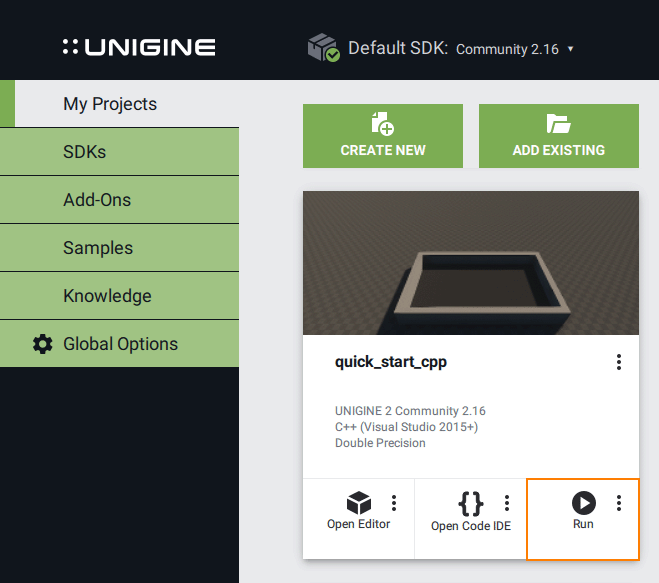
- Create a new empty C++ project. Open the SDK Browser, go to My Projects tab and click the Create New button.创建一个新的空 C++ 项目。 打开 SDK 浏览器,进入 My Projects 标签并点击 Create New 按钮。
-
Make sure to select C++ (Visual Studio 2022) in the API + IDE list of the Application section and click Create New Project.确保在 Application 部分的 API + IDE 列表中选择 C++ (Visual Studio 2022) 并单击 Create New Project。
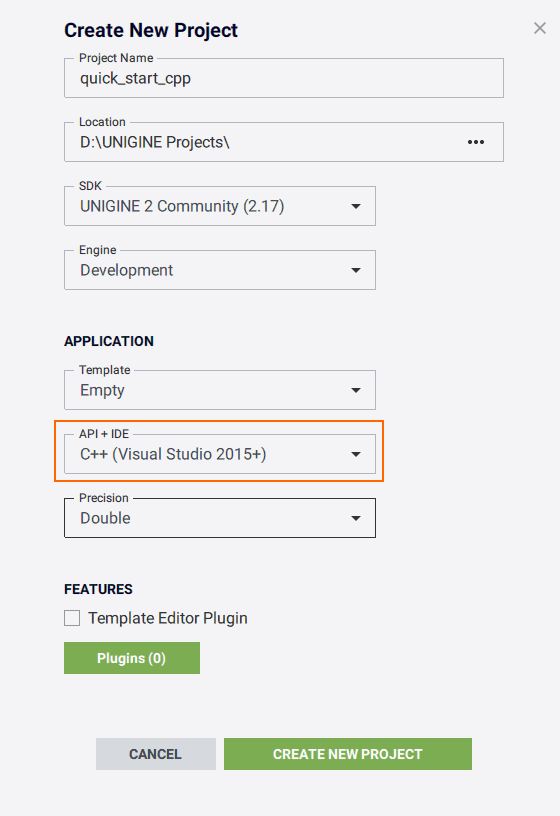
-
After the new project is created it will be added to the My Projects tab. Click Open Editor under the created project to open it in the UnigineEditor.创建新项目后,它将被添加到 My Projects 选项卡中。 点击创建项目下的Open Editor,在UnigineEditor中打开。

-
Download the Docs Sample Content add-on from Add-On Store at https://store.unigine.com/ and add it to the project by dragging into the project data/ folder in the Asset Browser. In the Import Package window that opens, click the Import Package button and wait until the add-on contents are imported. 从Add-On Store(网址:https://store.unigine.com/)下载Docs Sample Content插件,并通过拖拽到资源浏览器中的项目data/文件夹将其添加到项目中。在打开的Import Package窗口中,单击Import Package按钮,等待加载项内容导入完成。
另请参阅
For more details refer to the following topics:更多细节请参考下列主题:
- Project Workflow article to learn key information on the workflow stages for developing a project with UNIGINE.项目工作流程 文章了解使用 UNIGINE 开发项目的工作流阶段的关键信息。
- Programming Overview article to learn about the execution sequence and the ways of creating projects in Unigine.编程概述 文章了解 UNIGINE 中的执行顺序和创建项目的方法。
- Creating C++ Application article to learn about creating a C++ project in Unigine.创建 C++ 应用程序 文章了解如何在 UNIGINE 中创建 C++ 项目。
Step 2. Set Up the Scene步骤2。设置场景#
All objects added to the scene are called nodes. Each node has a position, a rotation, and a scale and some basic functionality, which can be extended with components. There are a variety of built-in nodes in UNIGINE.添加到场景中的所有对象都称为节点。 每个节点都有一个位置、一个旋转、一个比例和一些基本功能,可以用组件进行扩展。 UNIGINE 中有多种内置节点。
The Play Area in the game will be laid out with a lot of identical floor tiles. Visual representation of the floor tile is defined by a plane Static Mesh with a gray material assigned.游戏中的游乐区将布置有许多相同的地砖。 地砖的视觉表示由平面静态网格定义,带有灰色材质已分配。
So, we make floor tiles as Node References all referring to the single *.node file on a disk.因此,我们将地砖制作为 Node References,所有这些都引用磁盘上的单个 *.node 文件。
Before setting up the scene, let's remove the default nodes from the world. Delete the material ball and main player nodes in the default world.在设置场景之前,让我们把默认节点从世界。删除material ball和main player节点在默认的世界。

Now, we will create a template for the floor tile and save it as a Node Reference:现在,我们将创建一个模板的地砖和保存它作为一个Node Reference:
-
In the Asset Browser, choose the core folder and search for plane.mesh via the Search field. Then drag it to the Editor Viewport to create a new node in the world.在 Asset Browser 中,选择 core 文件夹并通过 Search 字段搜索 plane.mesh。 然后将其拖到 Editor Viewport 以在世界中创建一个新节点。
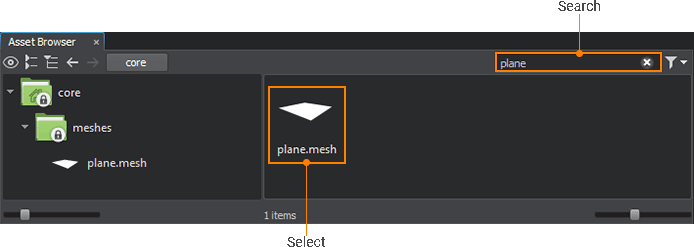
- Select the newly created node in the World Nodes window and rename (F2 hotkey) it floor.选择新创建的节点World Nodes窗口和重命名( F2 热键)floor。
- Choose the data folder and search for the floor_mat.mat material in the Asset Browser. Then drag it over the floor node in the Editor Viewport to assign the material.选择 data 文件夹并在 Asset Browser 中搜索 floor_mat.mat 材质。 然后将其拖到编辑器视口中的 floor 节点上以分配材质。
-
In the Editor Viewport use the manipulator to adjust the position of the default ground node, moving it slightly below the floor node to avoid z-fighting artifacts.在 Editor Viewport 中使用操纵器 调整 默认 ground 节点的位置,移动它 略低于 floor 节点以避免 z-fighting 伪影。

-
In the Surfaces section of Parameters window check the Collision option for the plane surface to enable collision detection.在 Parameters 窗口的 Surfaces 部分检查 plane 表面的 Collision 选项以启用 碰撞检测。
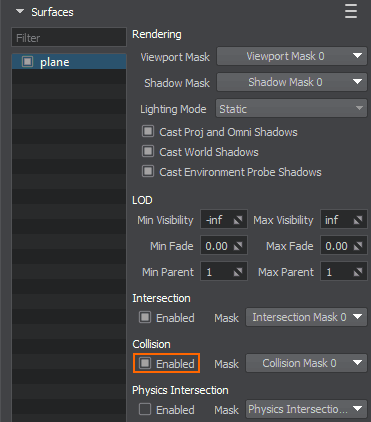
- Convert the floor node to Node Reference and save it as an asset on a disk: right-click on the floor node in the World Nodes window and select Create a Node Reference.转换 floor 节点到 Node Reference 并将其保存为资源 一个磁盘:在 World Nodes 窗口中右键单击 floor 节点,然后选择 Create a Node Reference。
另请参阅
For more details refer to the following topics:更多细节请参考下列主题:
- Creating and Deleting Nodes at Runtime article to learn how to manage nodes via the code.在运行时创建和删除节点 文章了解如何通过代码管理节点。
Step 3. Instantiate Nodes to Finalize the Play Area步骤3。实例化节点完成游戏区域#
Let's create a grid of floor tiles for the Play Area by instancing Node References. For walls we will use box primitives with the default base material and surface collision enabled to stop the character from going through them.让我们通过实例化 Node References 为 Play Area 创建一个地砖网格。 对于墙壁,我们将使用带有默认 基础材质 和 表面碰撞 的盒子图元,以阻止角色穿过它们。
Let's instantiate more of the floor tiles by duplicating the Node Reference via Ctrl + D hotkeys.让我们实例化更多的floor瓦片复制Node Reference通过Ctrl + D热键。
注意You can activate snapping by bound box via Shift + Z hotkeys. Click on the arrow next to the Snap by Grid icon on the Toolbar and choose the By Bound Box option. Select the floor node reference and clone it by holding the Shift key and moving the translate manipulator in the required direction.你可以通过绑定激活拍摄盒子通过Shift + Z热键。点击旁边的箭头Snap by Grid图标Toolbar并选择By Bound Box选项。选择floor节点引用和克隆它通过持有Shift键和翻译机械手在所需的方向上移动。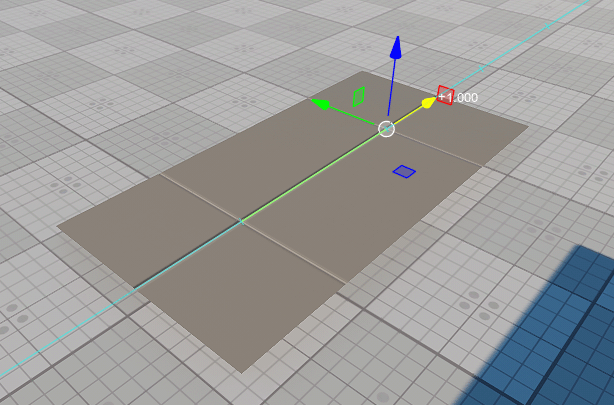 注意Alternatively, you can hold the Ctrl key to snap a node to the grid.或者,您可以提前Ctrl关键节点的网格。
-
You can also select multiple nodes in the Viewport or World Nodes window while holding the Shift key and then clone them all at the same time in a group.您也可以选择多个节点在Viewport或World Nodes窗口按住Shift键然后克隆同时在一组。
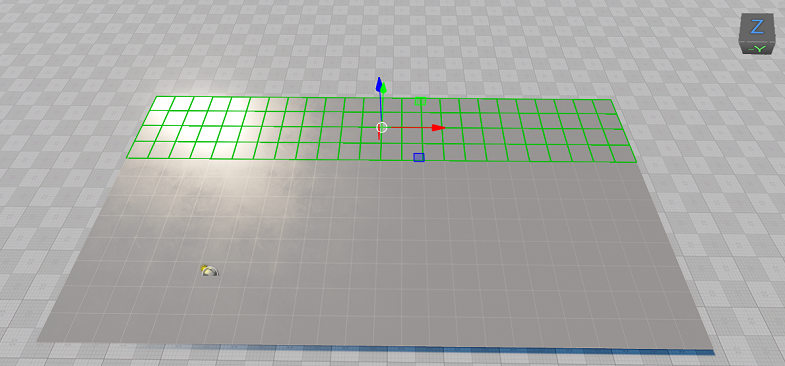
-
Create a wall by choosing Create->Primitive->Box and then specify the size in all dimensions. Make sure it resembles a wall and place it on the border of the Play Area.创建一个墙通过选择Create->Primitive->Box然后指定所有维度的大小。确保它像一堵墙,并将其边界的区域。
- To make the wall a collider, select it in the World Nodes window. Then, go to the Parameters window and find the Surfaces section in the Node tab. Select the box surface of the mesh and check the Collision option.使墙对撞机,World Nodes窗口中选择它。然后,去Parameters窗口,找到Surfaces节在Node选项卡。选择box表面网格并检查Collision选项。
-
Duplicate the primitive with Ctrl + D hotkeys and set up the opposite wall. Create the rest of the walls along the borders of the Play Area the same way.复制原始和Ctrl + D热键设置对面墙上。创建其余的墙沿边界的区域相同的方式。
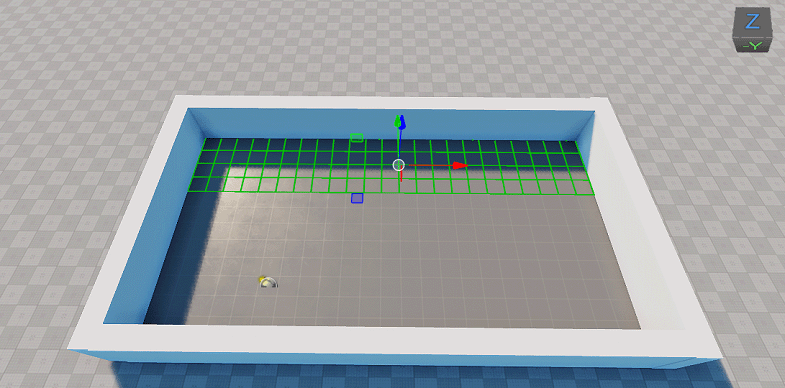
A World Light source (sun) is created for each world by default. So, the scene is lit and walls cast shadows on the ground. You can adjust rotation and other parameters of the light source via the Parameters window.默认情况下,会为每个世界创建一个 World Light 源(太阳)。 因此,场景被照亮,墙壁在地面上投下阴影。 您可以通过 Parameters 窗口调整光源的旋转和其他 参数。
Alternative way of creating Light Sources via the API is considered here.在本文中考虑了通过 API 创建光源的替代方法。
Step 4. Create a Player Camera步骤4。创建一个球员相机#
In order to see the world through the application window, you need to create a Camera and position it above the Play Area.为了通过应用程序窗口看世界,您需要创建一个 Camera 并将其放置在 Play Area 上方。
- Add a new Camera via Create->Camera->Dummy, and place it in the world.通过Create->Camera->Dummy添加一个新的相机,把它在世界上。
-
Adjust position (W hotkey) and rotation (E hotkey) of the PlayerDummy node via the manipulator in the Viewport.通过操纵器调整 PlayerDummy 节点的位置(W 热键)和旋转(E 热键) 在 视口 中。
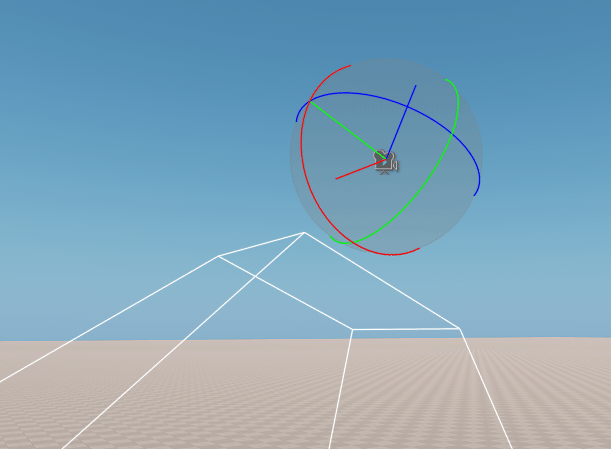
-
Check the Main Player option in the node's Parameters window to make it the default camera.检查Main Player选项的节点Parameters窗口默认的相机。
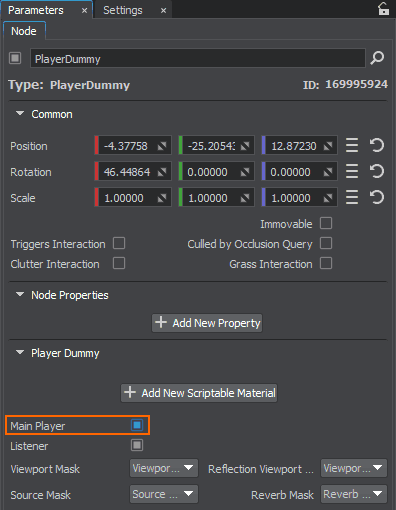
Alternative way of creating a camera via the API is considered here.in this article 考虑了通过 API 创建相机的替代方法。
Step 5. Save Changes and Run the Game第5步。保存更改并运行游戏#
Now, you can run the game via the SDK Browser.现在,您可以运行游戏通过SDK浏览器。
- To save changes to the world, go to File->Save World or press Ctrl+S hotkey.要保存对世界的更改,请转到 File->Save World 或按 Ctrl+S 热键。
-
Click the Run button in the SDK Browser to run the game with the scene we've just set up.点击 SDK Browser 中的 Run 按钮,使用我们刚刚设置的场景运行游戏。
本页面上的信息适用于 UNIGINE 2.19 SDK.
